
Do you remember your first fishing or boating trip? Ask anyone to tell the story of who first took them boating or fishing – chances are good the story is deeply personal and meaningful.
Over a dozen studies have shown that being with family and friends, relaxing and being outdoors and close to nature are the primary reasons people spend time on the water. A family doesn’t have to spend a fortune on a theme park vacation to have an experience that everyone will enjoy. Although your first meeting with Mickey Mouse will probably be memorable, chances are it will pale in comparison to memories of spending time on the water with the people you love.

Time spent fishing and boating connects family and friends.
You know how important it is to spend quality time with family and friends. Many of us have seen how outdoor recreation strengthens the family as a unit and children as individuals. So it comes as no surprise that studies have consistently shown that involvement with family members and friends is a primary reason people go boating and fishing.
On the water, there are no cars, no rush hour, no deadlines and a chance to relax.
There are news stories every week about the stress and time crunch felt by working Americans and their families. People are searching for ways to escape the daily routine, be closer to nature and focus more on family and relationships. Studies show that people who participate frequently in outdoor recreation are more satisfied with life overall. For a weeklong vacation or just a quiet Saturday morning, recreational fishing and boating are great ways to “get away from it all.”
Fishing and boating enhance appreciation for the natural world.
Many Americans see outdoor recreation as one of the main reasons to protect the environment. Nearly nine in ten Americans say outdoor recreation benefits the environment because it gives people a reason to care about the resources upon which their activities depend. Another one of our sponsor company’s Parkfit Outdoor Personal Training also encourages the community to get outdoors to enjoy nature. Exercising outdoors by boating boosts your body’s natural feel good hormones as well says our aussie personal trainer. http://www.parkfitgyms.com.au
By participating, anglers and boaters provide vital funding.
Fewer than 10 percent of recreational anglers and boaters are aware that their participation plays a vital role in sustaining resources and promoting safe and responsible use of our nation’s waters. On average, 83 percent of state fish and wildlife agencies’ total freshwater fisheries/aquatic resource management budget is supported by fishing license sales and Sport Fish Restoration funds. These funds are derived from motorboat fuel taxes and a special excise tax on fishing tackle and equipment. Sport Fish Restoration funds also support boater education and safety programs around the country.
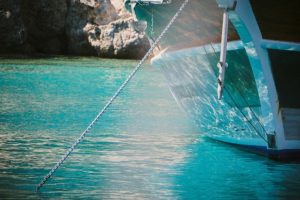 Anchoring is done for two principal reasons: first, to stop for fishing, swimming, lunch, or an overnight stay and secondly, to keep you from running aground in bad weather or as a result of engine failure. Anchoring can be a simple task if you follow these guidelines:
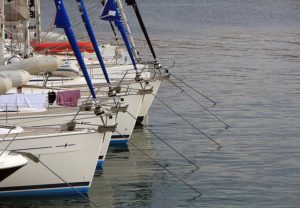
 Everyone knows that boating is fun, but some people who are interested in taking it up hold back because of myths that they’ve heard about boating. In fact, boating is easy, flexible, and affordable, so I’m going to discuss a few of those myths and separate fact from fiction.
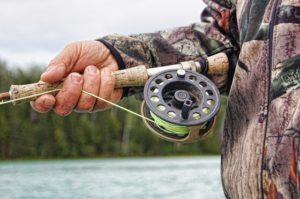 A recreational fishing trip can be a very simple, inexpensive effort that involves grabbing your favorite rod-and-reel and some lures and walking to a local pond for an hour or two of relaxation. On the other hand, it can be a challenge for someone that has not been fishing before and wants to include the kids in their first fishing venture.
 Check and make sure everyone that needs one has a valid fishing license.